PCF 101 - The Missing Manual
Introduction
Microsoft documentation is a great source of learning but still need more transaltion for less experienced developers.
Here is my study notes when I went through the PCF quick start document. I organized them in sections similar to the original article so you can refer back and forth easily.
Prerequisites
This is unrelated to the setup steps of this example project but it worth to mention that you should avoid install packages globally to avoid version issues.
npm install --save-dev jest
Creating a new component project
The component project has three levels Level 1: The component project level Level 2: The control level Level 3: The solution level - this is for building up a Dynamics 365 solution.
In the Microsoft example: Level 1: LinearInput Level 2: LinearInput/LinearInputControl Level 3: LinearInput/LinearInputControl/Solution
Command line breakdown
pac pcf init --namespace SampleNamespace --name LinearInputControl --template field --run-npm-install
The pac pcf init command is used to initialize a new PowerApps Component Framework (PCF) control project. pac stands for Power Apps CLI (Command Line Interface), which is a set of command-line tools to work with the Power Apps platform. pcf refers to the PowerApps Component Framework, and init stands for initialize.
Here’s a breakdown of the command above:
- pac: Power Apps CLI, the command-line tool for Power Apps platform.
- pcf: PowerApps Component Framework, the target of the command.
- init: Initialize, the action to create a new PCF control project.
The command is followed by several options and arguments. You may wonder what is the difference the double dash (–) and single dash (-) in command-line arguments.
- Double dash (–): Typically used to specify long-form options or arguments, such as –name, –namespace, and –template. These options are often more descriptive and self-explanatory.
- Single dash (-): Typically used for short-form options or arguments, such as -n, -v, or -o. These options are often abbreviated versions of their long-form counterparts.
You may be familiar with the ‘npm install’ command, and wonder the reason why “pac pac init” needs three part, yet “npm install” only has two parts?
The reason why pac pcf init has three parts while npm install has only two is that the pac command has a hierarchical structure, while npm has a flat command structure. The pac command groups related commands together, such as pcf, solution, and plugin. The init command is a subcommand of pcf and helps create a new PCF control project.
What is significant of the –namespace parameter? Where the namespace name will appear?
Example Name:
Implementing manifest
What is a manifest file?
in programming, a manifest file is typically used for deployment purposes, providing essential information about the application or component to the host system. Manifest files are often used in different programming frameworks, like Android and PowerApps Component Framework, among others.
For Android, the manifest file is called “AndroidManifest.xml,” which contains essential information about the app, such as its package name, components (activities, services, broadcast receivers, and content providers), permissions it requires, and other metadata. The Android operating system uses this information during the app installation and runtime process.
In the PowerApps Component Framework (PCF), the manifest file is called “ControlManifest.Input.xml.” This file contains metadata about the custom control, such as the control’s name, display name, description, version, and resources (e.g., CSS, JavaScript, images). The manifest file also defines properties, events, and other aspects of the component. When deploying a custom control in the PowerApps environment, the manifest file helps the platform understand how to handle and integrate the control.
In both cases, the manifest file serves as a crucial element for deployment, helping the host system know how to handle the application or component and its resources.
Input and Output properties
In this example, the Input and Output property is the same one controlVale.
    <type-group name="numbers">
      <type>Whole.None</type>
      <type>Currency</type>
      <type>FP</type>
      <type>Decimal</type>
    </type-group>
    <property name="controlValue"
      display-name-key="Control Value"
      description-key="Control value description."
      of-type-group="numbers"
      usage="bound"
      required="true" />
Complete manifest
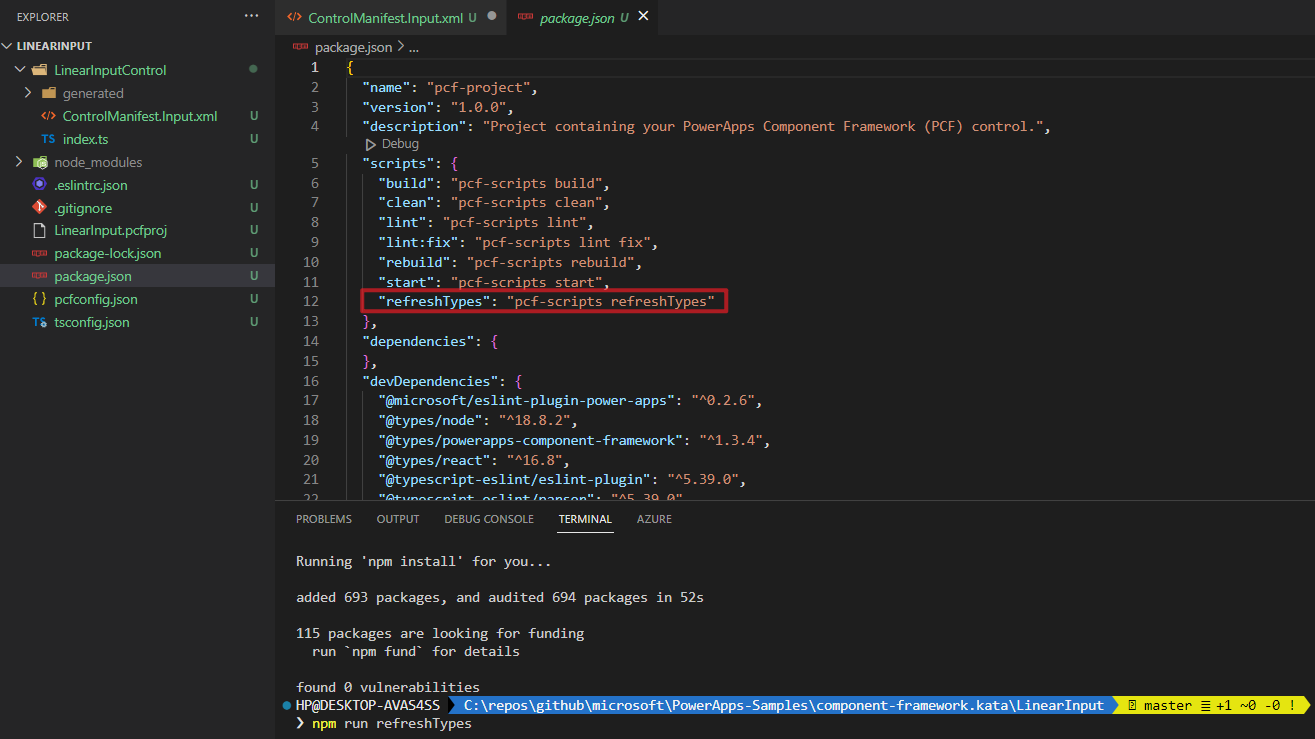
The refreshType command is defined in the package.json file
npm run refreshTypes
Implementing component logic
Entire component logic code:
import { IInputs, IOutputs } from "./generated/ManifestTypes";

export class LinearInputControl
implements ComponentFramework.StandardControl<IInputs, IOutputs>
{
    private _value: number;
    private _notifyOutputChanged: () => void;
    private labelElement: HTMLLabelElement;
    private inputElement: HTMLInputElement;
    private _container: HTMLDivElement;
    private _context: ComponentFramework.Context<IInputs>;
    private _refreshData: EventListenerOrEventListenerObject;

    /**
     * Empty constructor.
    */
    constructor() {}

    /**
    This is the most important method here. It is called when an instance of the component is initiated.
        + It initiates the DOM
        + It sets up the event handler for the input element (the slider) event
        + It triggers/notifies the OutputChanged event
    */
    public init(
    context: ComponentFramework.Context<IInputs>,
    notifyOutputChanged: () => void,
    state: ComponentFramework.Dictionary,
    container: HTMLDivElement
    ): void {
        // Add control initialization code
        this._context = context;
        this._container = document.createElement("div");
        this._notifyOutputChanged = notifyOutputChanged;
        this._refreshData = this.refreshData.bind(this);

        // creating HTML elements for the input type range and binding it to the function which
        // refreshes the control data
        this.inputElement = document.createElement("input");
        this.inputElement.setAttribute("type", "range");
        this.inputElement.addEventListener("input", this._refreshData);

        //setting the max and min values for the control.
        this.inputElement.setAttribute("min", "1");
        this.inputElement.setAttribute("max", "1000");
        this.inputElement.setAttribute("class", "linearslider");
        this.inputElement.setAttribute("id", "linearrangeinput");

        // creating a HTML label element that shows the value that is set on the linear range control
        this.labelElement = document.createElement("label");
        this.labelElement.setAttribute("class", "LinearRangeLabel");
        this.labelElement.setAttribute("id", "lrclabel");

        // retrieving the latest value from the control and setting it to the HTMl elements.
        this._value = context.parameters.controlValue.raw!;
        this.inputElement.setAttribute(
            "value",
            context.parameters.controlValue.formatted
            ? context.parameters.controlValue.formatted
            : "0"
        );
        this.labelElement.innerHTML = context.parameters.controlValue.formatted
            ? context.parameters.controlValue.formatted
            : "0";

        // appending the HTML elements to the control's HTML container element.
        this._container.appendChild(this.inputElement);
        this._container.appendChild(this.labelElement);
        container.appendChild(this._container);
    }

    public refreshData(evt: Event): void {
        this._value = this.inputElement.value as any as number;
        this.labelElement.innerHTML = this.inputElement.value;
        this._notifyOutputChanged();
    }

    /**

    */
    public updateView(context: ComponentFramework.Context<IInputs>): void {
        // Add code to update control view
        // storing the latest context from the control.
        this._value = context.parameters.controlValue.raw!; // the exclaimation mark at the end is for null checking.
        this._context = context;
        this.inputElement.setAttribute(
            "value",
            context.parameters.controlValue.formatted
            ? context.parameters.controlValue.formatted
            : ""
        );
        this.labelElement.innerHTML = context.parameters.controlValue.formatted
            ? context.parameters.controlValue.formatted
            : "";
    }

    /**

    */
    public getOutputs(): IOutputs {
        return {
            controlValue: this._value,
        };
    }

    /**

    */
    public destroy(): void {
        // Add code to cleanup control if necessary
        this.inputElement.removeEventListener("input", this._refreshData);
    }
}
Scenario: When a user slides the linear control
When a user slides the linear control, the refreshData function will be triggered. This function is bound to the “input” event of the inputElement (the linear slider) in the init method:
this.inputElement.addEventListener("input", this._refreshData);
The _refreshData function updates the _value property, updates the labelElement to display the current value of the slider, and calls the _notifyOutputChanged callback:
public refreshData(evt: Event): void {
   this._value = this.inputElement.value as any as number;
   this.labelElement.innerHTML = this.inputElement.value;
   this._notifyOutputChanged();
}
By calling _notifyOutputChanged, the framework is informed that the control has new outputs ready to be retrieved asynchronously. In other words, the control tells its host (Power Platform) that hey, I changed, here is the output, and please act accordingly.
getOutputs() function
When the framework is notified by the _notifyOutputChanged function, it calls the getOutputs() function.
public getOutputs(): IOutputs {
   return {
      controlValue: this._value,
   };
}
The main difference between refreshData() and updateView()
The main difference between refreshData() and updateView() is the event that triggers them and their purpose within the context of the PowerApps Component Framework (PCF).
- refreshData(): This function is triggered by a UI element change, specifically when the user interacts with the control, such as dragging the slider in your example. In this case, the refreshData() function is responsible for updating the control’s internal state, updating the UI (e.g., the label displaying the current value), and notifying the framework that the output properties have changed by calling the notifyOutputChanged() callback. This function is primarily focused on handling user interactions with the control.
public refreshData(evt: Event): void { this._value = this.inputElement.value as any as number; this.labelElement.innerHTML = this.inputElement.value; this._notifyOutputChanged(); } - updateView(): This function is triggered when an input property or any value in the property bag has changed. These changes can be due to external factors, such as updates in the bound data source, form field values, or other parts of the application. The updateView() function is responsible for updating the control’s view to reflect the latest state of the input properties and ensure that it stays in sync with the rest of the application.
public updateView(context: ComponentFramework.Context<IInputs>): void { this._value = context.parameters.controlValue.raw!; this._context = context; this.inputElement.setAttribute( "value", context.parameters.controlValue.formatted ? context.parameters.controlValue.formatted : "" ); this.labelElement.innerHTML = context.parameters.controlValue.formatted ? context.parameters.controlValue.formatted : ""; } - this.refreshData.bind(this)
this._refreshData = this.refreshData.bind(this);
The bind function if native to JS and it will bind the this keyword to the “this” object during the component initialization.
Property bags
The “property bags” term is a generic concept, meaning a set of key-value pairs for stats/settings/configurations. In this example, it means the context object passed into the init function.
Deploy
I got the following error after run the npm run build command
error if I build without the rule:
[8:03:21 PM] [build]  Failed:
[pcf-1065] [Error] ESLint validation error:
C:\repos\github\microsoft\PowerApps-Samples\component-framework.kata\LinearInput\LinearInputControl\index.ts
  11:27  error  'EventListenerOrEventListenerObject' is not defined  no-undef
The build error I encountered was because, without the “no-undef”: [“warn”] rule in my .eslintrc.json file, ESLint treats the use of undefined variables as an error by default, which causes the build to fail.
In the code example , you are using EventListenerOrEventListenerObject, which is not explicitly defined or imported in the index.ts file:
private _refreshData: EventListenerOrEventListenerObject;
Since ESLint is unable to find a definition for EventListenerOrEventListenerObject, it raises the no-undef error, and the build process fails.
To fix the build error, you can:
-
Add the “no-undef”: [“warn”] rule to your .eslintrc.json file, which will treat the use of undefined variables as warnings instead of errors. This will allow the build to continue, but it’s not the best practice as it might allow undefined variables to be used in your code.
-
Replace the EventListenerOrEventListenerObject type with a more specific type. In this case, you can use the more common EventListener type for your _refreshData property.
The EventListenerOrEventListenerObject type is part of the TypeScript DOM typings and represents the union of two types: EventListener and EventListenerObject. However, you don’t typically need to use this type directly in your projects, as it’s primarily used internally within the DOM typings.
Instead, you should use the EventListener type for your _refreshData property, as it is more specific and accurate. The EventListener type is a function type that takes an Event object as its parameter:
type EventListener = (evt: Event) => void;
To fix the issue in your code, update the type of _refreshData property to EventListener:
private _refreshData: EventListener;
This should resolve the ESLint error and allow your PCF project to build successfully. It’s generally better to use a more specific and accurate type for your variables and properties, as it improves code readability and helps catch potential issues during development.
Packaging your code components
.NET 6 SDK (Recommended)
When using the .NET 6 SDK and the dotnet command-line tool, the process of restoring packages and building the solution becomes simpler. The dotnet build command automatically restores the necessary packages and dependencies before building the solution. In this case, you don’t need to run a separate restore command since dotnet build takes care of restoring the packages before the build.
To build your solution using the .NET 6 SDK, simply run:
dotnet build
msbuild
Running msbuild twice in this context serves two different purposes. The first command, msbuild /t:restore, is used to restore the necessary packages and dependencies for your solution, while the second command, msbuild, is used to build the solution itself. Let’s break down these two steps:
msbuild /t:restore: This command executes the “restore” target in the MSBuild process. The “restore” target is responsible for restoring NuGet packages and other dependencies required by your solution. This is an important step to ensure that all necessary packages are available before building the solution.
msbuild: This command is the standard command to build your solution using MSBuild. It compiles your code, processes resources, and generates output files (such as executables, libraries, or deployment packages). The build process relies on the packages and dependencies restored in the first step.
Running the commands separately ensures that the package restoration process is completed before attempting to build the solution. This helps avoid build errors due to missing or outdated packages.
msbuild /t:restore
msbuild
Add reference
The relative path to the component level folder is accurate.
pac solution add-reference --path ..\..\

Alternatively, you can add code components reference to the cdsproj file manually.
  <ItemGroup>
    <ProjectReference Include="FetchXmlGrid\FetchXmlGrid.pcfproj" />
    <ProjectReference Include="MultiSelectLookup\MultiSelectLookup.pcfproj" />
  </ItemGroup>
Solution name
The solution name after imported into Power Platform is the same as the solution folder name you created.

Solution version and control version
The control version is located in the cdsproj file.
The solution version is located in src\Other\Solution.xml
What is the difference between pcf pac push and fully package solution?
Managed solutions.
Control Type
Standard vs Virtual. D365 already uses React and FluentUI libraries. The new virtual compoent reuses those libraries instead of pack their own React and FluentUI libraries, which is much more efficient and the way forward.
Control Data Bind Types
Field vs Dataset.
Comments